Design Your Own Cloth Doll
Class
©1995 with additions copyrighted 1996-1997
Taught by Judi Ward of Judi's Dolls
Chapter 1 and 2
Part A
.ģARMS AND HANDSģ
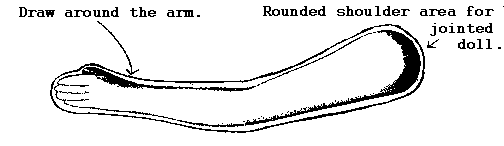
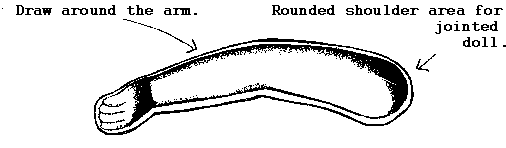
Place the arm down on a piece of freezer paper or plain paper, with the joint flange down. Holding your pencil STRAIGHT UP AND DOWN draw around the arm, while holding the arm down firmly with your fingers. NOTEģIf you slant your pencil inward, the doll will be skinnier. If you slant your pencil outward, your doll will be fatter. It is very important that you hold your pencil STRAIGHT UP AND DOWN for drawing around all of the parts for this first doll pattern. The vinyl doll is in proportion, so if you slant the pencil in for the arms and out for the legs etc. you will lose that proportion. Later you can play with the pattern you have designed to make any proportion you want. Long skinny legs and arms. Big body and tiny head. Big head and little body etc. The shapes and variations are practically limitless! ģNOTEģI have noticed that some of the vinyl dolls arms are a little short for their bodies. After you make one doll from the pattern you are designing, you may need to lengthen the arm pattern a little. This is especially true for the lady dolls. The doll I am using needed to have her arm pattern lengthened 1/4" between the shoulder and elbow, and 1/4" between the elbow and wrist. She didn't look awful with the shorter arms, but I wanted them more true to human proportion. TO ACHIEVE TRUE HUMAN PROPORTION the finger tips should be 1/2 way between the crotch and the knees.
LADY TYPE, VINYL DOLL ARM
CHILD TYPE, VINYL DOLL ARM
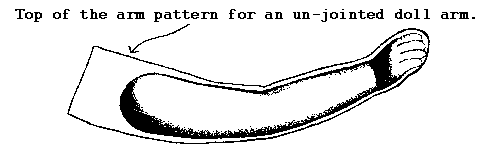
If you wish to make un-jointed, stitched on arms, draw about 1/2" past the top, rounded shoulder area, then straight across as shown below. This is for a lady, child or baby doll.
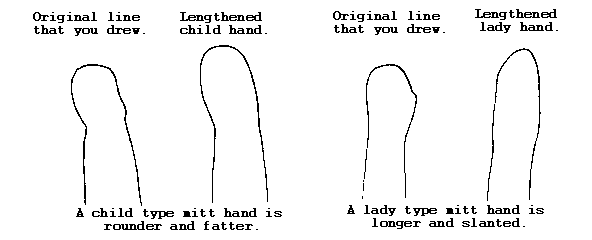
When you get to the hands, you won't worry about the fingers since we are making the simpler mitt hands for the first doll.
The hands are usually turned slightly so just draw around the whole thing, making a curved, thumb-less mitt.
You will need to lengthen and round the mitt out a little, since the vinyl hand probably curves inward so it loses some length.
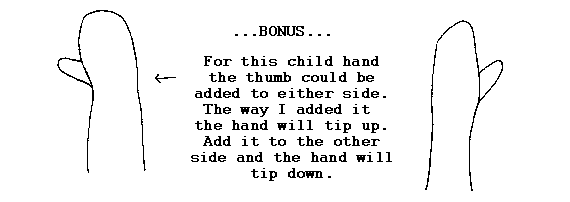
Add the thumb as shown. It's just a skinny U shape
|
.ģFOR MORE ADVANCED DOLLMAKERSģ At this time, if you wish to add hands with fingers, use one of the "finger hands" that you designed from the free Hand Design class, which preceded this Doll Design class. Remember though, that very small hands don't take too well to finger sewing and turning, especially if you are a beginner at sewing around tiny curves. For the hands in the sizes shown above, I would use the "fingers together" type hand for the lady and the 2 center fingers together for the child. On the first draft pattern pieces the lines you drew may be a little wiggly, If so, even them out, then cut the arm pattern/patterns out and set aside |
Judi Ward
Judi's Dolls
http://JudisDolls.com

© 1998, Internet Visions Co. All rights reserved. All trademarks are owned by Internet Visions Company.