Design Your Own Cloth Doll
Class
©1995 with additions copyrighted 1996-1997
Taught by Judi Ward of Judi's Dolls
DESIGNING THE HEAD
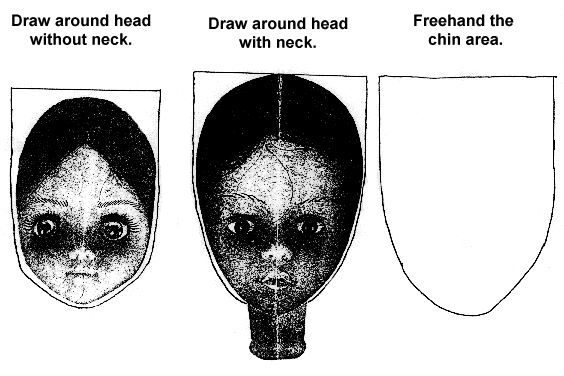
For designing the head, you will hold it down and draw around it just as you have done for the arms, legs and body. ELIMINATE the neck if it’s there. You will have to freehand the chin for the dolls with the neck attached to the head, but it’s just a little area and you can do it!
Draw straight across the top of the head. This is where you will leave open to stuff. I like this straight top design better myself, because after you stuff the head VERY FIRMLY you gather around the top, pull the gathers tight and it gives more shape and roundness to the head.
Of course you will want both sides of the head to match, just like for the body, so after you draw around it, cut the pattern piece out, fold it lengthwise, and trim it even.
When drawing around the head/heads, you will have to get the hair out of the way as best you can. Some of my students choose to cut the hair off, which is fine too, but it ruins the vinyl doll for any other use. On the plus side, if the hair is long, you might be able to glue it on a cloth doll!
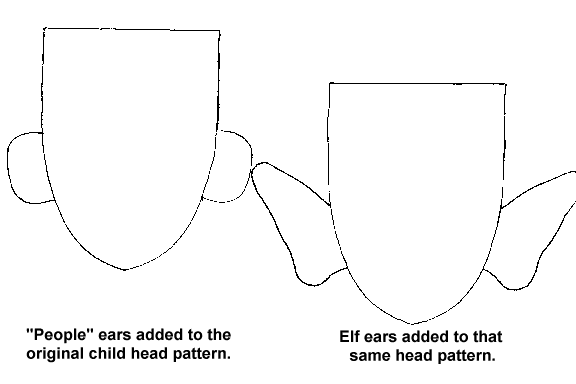
If you want to add ears to the head design, you only need to draw one since you will be folding the head in half lengthwise, as directed above, to be sure both sides match. Ears can be kept simple for this type of doll as they are often hidden under the hair anyway. Simple ears are just an elongated U shape at the sides of the head. For general reference, remember that “people” ears align with the eyebrows at the top and with the lips at the bottom.
The points on fairy or elf ears can be any length you desire. My sister made a 16” tall elf with ears about 4” long! She then placed wire in the outer edges of the pointed ends, top stitched to keep the wires in place, and the ears are folded and twisted so the appear curly!
Find some pictures of fairies and elves to see some different shapes. You can trace a shape from a storybook if you wish, and reduce or enlarge it on a copy machine. You can use the ones I have drawn here for starters if you wish, but practice and try to do your own. Don’t use an ear from another designer’s pattern. It will make you feel guilty, and it is copyright infringement.
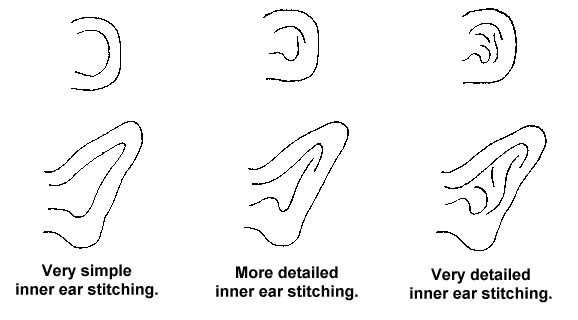
After you turn the head/heads right side out, do some stitching inside the ears. Either just around the edge or in more detail to resemble the inside of a real ear. Another ear note: You can lightly stuff the ears before you do any inner ear stitching.
The ears can be tacked back to the head, after your doll is stuffed or left sticking out.
You should now have patterns for legs, arms, bodies and heads for the doll/dolls you have chosen to draw around and make.
Now simply draw around your patterns on doubled fabric and sew just inside the lines you drew. Of course, make two arms and two legs and leave at least 1/2” between each piece. If you are making a darted bust lady doll follow the darting directions on page 13.
Be sure to:
Happy Designing!
Judi Ward
Judi's Dolls
http://JudisDolls.com

© 1998, Internet Visions Co. All rights reserved. All trademarks are owned by Internet Visions Company.