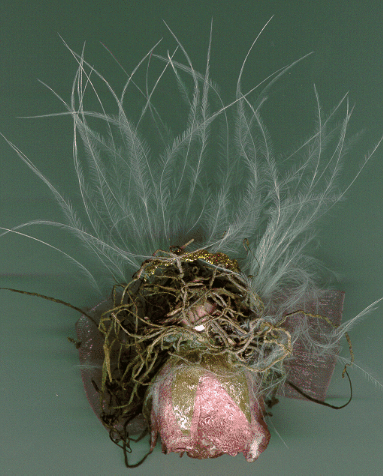
Presented by Crafty College, Bluebonnet Crafters and Miles Country Smiles Rose Angel Ornament
For One Angel 1 small paper rose 1 small bead for the head 10 inches of 1" wide silk ribbon A tiny piece of white feather, just enough to add a little flare 8 inches of 1/4 or 1/8 wide gold ribbon 1 small button Spanish moss Scrap of decorative ribbon for halo Glue gun First thing to do is plug in the glue gun to heat
it up.
Next, get the gold ribbon and fold it in half and tie a knot on the end. Now you are ready to start gluing. First, glue on the head (bead) to the bottom part of the rose. Next take a bundle of Spanish moss and fit it on. Once you have the look you want, glue it on. Glue the feather on next. It goes on the backside of the Angel between the head and the body. Now, get your gold ribbon and glue it on the back of the feather. Glue the knot of the bow on the knot of the ribbon, then the button on the knot of the bow. Phew! Now, push these together while the glue is still warm. Be careful not to burn yourself. Last, glue the decorative trim to the back of the head to create the halo. Finished! Options: You could use a small wooden apple for the head and paint it. Use pearls instead of decorative trim for the halo and you could also use sticks or feathers for the wings. Instead of making an ornament, make a pin, it looks real cute and you will get a lot of compliments. If you do make a pin, I strongly suggest using a good craft glue and NOT a glue gun to glue on the pin. Thank you for your interest and I hope you enjoy
her as much as I do.
| Back to the Classroom at Crafty College |
Designed and Created by Christina D. Miles
Copyright Notice: All pages and graphics are copyrighted by the Internet Visions Company and/or instructor. You may print these out for the use of the class only. All other uses or distributions are forbidden. Crafty College is a division of the Internet Visions Company. © 1998, Internet Visions Co. All rights reserved. All trademarks are owned by Internet Visions Company. |


