Presented by Crafty College, Bluebonnet Crafters and Nettie Groom Abbigail
This is Abbigail and she is my gift to you.
Materials
The first thing you should do, no matter what wing design you use, is to transfer the wing pattern onto your fabric. For prequilted fabric, cut ONE (1) on the fold. FOR WINGS YOU DESIGN AND QUILT: Cut 2 on the fold, then cut one wing (on fold) from batting. Place the two fabric wings, right sides together, lay the batting wings on top, and sew all together. Leave an opening at the center top for inserting the wire and for turning. Clip wings, trim and turn right side out. CONSTRUCTING THE ANGEL'S WINGS
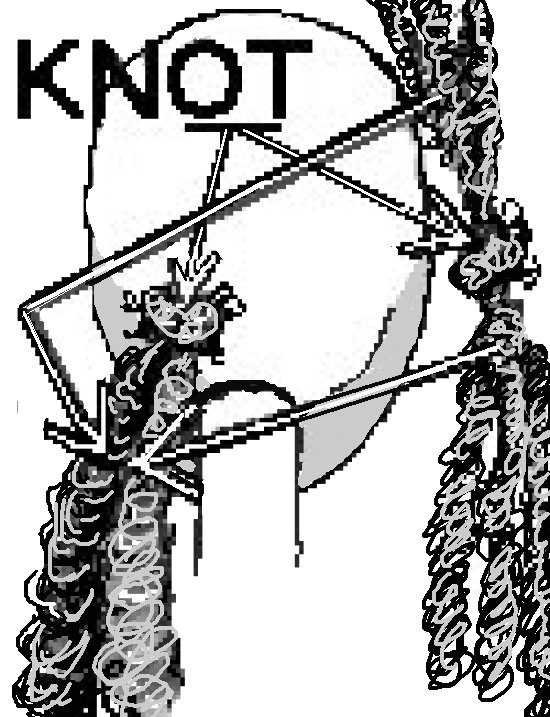
FOR WINGS YOU DESIGN AND QUILT: Sew a 1/4" casing (the redline) around the upper edge of the wings. Follow the lines or design your own for quilting the wings. Use gold or silver metallic thread for this step. IF YOU USE HEAVY UNCOATED FLOREST WIRE, YOU WILL HAVE TO FASTEN 2 PIECES TOGETHER AT THE CENTER (Aprox. 2" on each end will overlap.). Tape the ends of the wire and insert into the casing that was formed around the outer edge of the wings. ** FOR PREQUILTED WINGS: You may stitch designs on the quilted fabric or leave plain. Hot glue or whip stitch gold or silver tensil stems around the outside of the wings. Overlap stems slightly and fasten securely. CONSTRUCTION OF THE DOWEL BODY SUPPORT 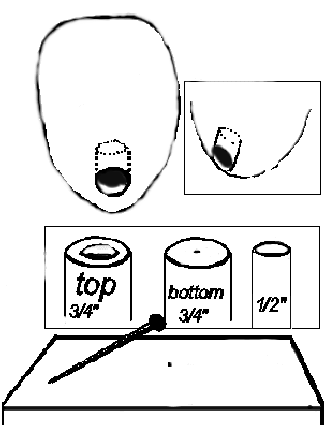 This is a rough diagram of the placement of the holes used to connect the dowel body. The 1/2" dowel is used for the neck. Cut it 2 1/4" long. Center and drill a 1/2" hole to 3/4" deep in the 3/4" dowel. Note how the hole in the head part is NOT centered and is also drilled at a slight angle. You may need help on this part. Measure 1/2" from the center POINTED end. The 1/2" hole will also be 3/4" deep. This leaves 3/4" for the neck. DO NOT GLUE the head on at this time. Use wood
glue to join the neck to the body. Turn the body end up and put a pilot
hole in the center. Also, do the same to the base on which it will be attached.
Use wood glue and the screw to attach these parts together. Set aside to
dry.
MAKING THE BODY This is simple because it is all one piece - well, a front and back :-). Trace each body pattern on to tissue paper. It is color coded to make it easier to find the body and the under and over robes. The body patterns are RED and on seperate pages. The robe patterns are BLACK. Take up the darts as marked, place right sides together, make adjustments, pin and sew together with scant 1/4" seams. Leave open at neck and bottom, and split where indicated. Clip curves, trim and turn right side out. Fold down for casing around top edge, run quilting thread through casing. Sew gathering stitches around the bottom. ATTACHING THE WINGS: You will use the quilting thread to attach the wings. Begin by wrapping dowel with a strip of batting 18" X 12" and secure with glue. Next, slip body over dowel, pull up gathers to fit dowel at bottom, tuck under the lower edge, tie securely, and glue to base, being sure to pull the shape out as much as possible. Let dry. When dry, center the wings at the back with the top of the wings even with the top of the 3/4" dowel. Pin to hold in place. Begin at the BOTTOM INSIDE of the wings. Push needle through at an angle in order that ONLY shorter stitches will be visible on the outside of the wings. You may use a circular sewing method or a 'shoelace' method. When you reach the top, wrap the quilting thread around the neck at least 2 times before starting back down. Tie and glue at top and bottom. Pull body up over batting wrapped dowel, stuffing any body section that needs extra padding, as you go. If you plan to form the fingers, stuff hand very lightly and stitch to form fingers BEFORE stuffing arms. NOTE: You may want
to put wires in the arms for positioning. Do so at this time. Fill out
shoulders and bust area and pull up gathers at neck, tie and glue. Whip
stitch body back opening to inside of wings as close to the center as possible.
MAKING THE ROBES:
Each robe is on the page with each body pattern. Trace each to tissue paper, making sure to add the length stated for each robe (11" for each). Fold each piece of fabric in half lengthwise and then in half crosswise. Pin securely. You should now have folded fabric which measures aprox. 18"X 22"(1 1/4 yds. of 36") or 22" X 22"(1 yd. of 44"-45"). Lay pattern so TOP/SLEEVES are ACROSS the shorter length of fabric for the one measuring 18" X 22". Make sure the front/back and arm/neck edge are along the FOLDS. Cut each robe this way. Open, mark and split the backs as indicated. Sew underarm and side seams. Clip and trim all curves. Turn, press. Stitch gathering lines and add lace to hems and sleeves (outer robe, only). Dress Angel in under robe, pull up gathers to fit waist, neck, and wrists (pull sleeve away from wrists to make it fuller). Tie, glue, and clip threads. Make cuff of lace for sleeves and glue or stitch to gathers and wrists. Whip stitch at center back the same as for body. LET YOUR CREATIVITY GO WILD WITH THE OUTER ROBE! Follow the same directions as for the under robe, but decorate to your
heart's content. When you put the outer robe on her and pull up the gathers
at the neck, you will use lace to cover the edges of both the under and
outer robes (stitch or glue in place). Don't forget to whip stitch the
robe to the center back under the wings.
Those of you who want to design and paint your own faces, be my guest.
Others may use the examples shown - a couple are very simple and cute.
For those needing help mixing colors for skin - light/dark, please
ASK me. I will respond as soon as possible. NOTE:
Do not paint the area where the hair attaches. NOTE THE WHITE AREAS on
the head EXAMPLE.
APPLYING HAIR TO THE HEAD
I use 'hot glue' because it dries faster, but you use the type of glue with which you are comfortable. Also, if you are used to applying hair to wooden doll heads, use your own method. I pull out 3-5 strands of curly hair twice the length I want the hair to be and tie an overhand knot in the center. Let both ends fall down, and apply hot glue to the knot. Place and hold the knot against the lower BACK of the head. Continue this way until you fill in a row from one side to the other. As you move upward and towards the front, gradually shorten the length of the hair. This helps it hang more natural. You can make the hair have a side part, center part or pull straight back . SIDE PART: When you reach the crown area of the head, make your last row of hair about 'eye-level'. Start the final rows at either right or left side and continue up and over to meet the last row you made. CENTER PART: Do the same as for side part, but make rows come to center and stop. **NOTE**: The knots should always be towards the position of the part with the strands of hair hanging DOWN. PULLED BACK: When you reach the crown, place all the knots facing the front of the head. Attaching halo: Cut a tensil stem to about 8 1/2", twist ends together
to form a circle. Measure from top of head down the back about 1". Separate
hair until you find a bare spot. Hot glue the twisted ends to the head,
then pull hair back through halo.
| Back to the Classroom at Crafty College |
I have been drawing and designing since I can remember. I have several
drawings on my personal web page. These were all done or started before
I became legally blind. I have not let my disability stop me from doing
what I enjoy doing. I've had to change some of those things. I cannot do
portraits anymore, but with X-strong magnification and very short work
periods, I can still make my angels and I've began to sculpt. God has been
good to me.
Copyright Notice: All pages and graphics are copyrighted by the Internet Visions Company and/or instructor. You may print these out for the use of the class only. All other uses or distributions are forbidden. Crafty College is a division of the Internet Visions Company. © 1998, Internet Visions Co. All rights reserved. All trademarks are owned by Internet Visions Company. |