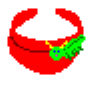
Buggy Visor
Lesson 2
If you are setting up your program under the auspices of a tax exempt entity whether it is a church, school or park department this sponsoring organization becomes an asset in providing donations of materials for a fair value receipt that can be used as a tax write off.
Stores that have craft departments and craft stores themselves can be approached to request supplies for your program. Since you will be opening the supplies and sharing them, supplies that have been partially used in demonstrations and classes at the stores will work quite well. Discontinued items donated to your program give the store a nice write off and you needed supplies. Projects developed from the things you have on hand are much easier than planning a project and then trying to find the supplies
Your sponsoring organization will undoubtedly supply you with some type of budget. From this budget you should purchase the basic craft supplies at the best possible price (utilizing discounts allowed for non-profit organizations).
Donations can be solicited from other businesses
in the area as well as asking members of your sponsoring organization and
the childrens' parents to help. The majority of supplies from these sources
will be items that can be recycled.
Buggy Visor
Each child will have one visor and a number of the other supplies allowing them to make the bug of their choice. Several small pompoms with eyes in the first pompom will form a caterpillar. Stamens (pips) from silk flowers and silk flower petals can be used to dress a pompom bug, form his antennae and two tiny wiggle eyes and a very tiny black pompom or bead for the nose. Just arrange the materials down the center of the table and provide each child with an applicator stick and glue to share and let their imaginations create the visor they want with their own unique bug or bugs on it.
To finish the visors let each child sign their
masterpiece.
Pencil Topper
Fold chenille stem number one over the eraser end of your pencil and hold it together by the eraser. Wrap one leg of the chenille stem around the pencil and the second leg two turns holding it down along the side.
Take the other chenille stem wrapping it in the opposite direction two turns. Make a fold up 3/4" from the end of the stem on each side. This will form the legs. Fold chenille stem number two in half and place it around the pencil and the top of the legs. Make one full twist at the back to anchor it in place. Wrap one arm counter clockwise two turns and the other one clockwise two turns. Make a twist of both arms at the back and shape them.
Glue a pompom head on the front. Add wiggle eyes
and other embellishments to decorate your pencil topper
Bluebonnets in a Vase
Instructions:
Fold the chenille stem creating one side a little longer than the other. Beginning with the dark blue beads place four on the longer arm and three on the short arm. Place 3 light blue beads above the four on the long arm and place two above the dark blue on the shorter arm. You will then add two clear to the longer arm and one clear bead to the short arm.
Make a one quarter inch fold in the end of each arm and fold that one quarter inch fold in half forming a small tight green knot at each end of the chenille stem. Push the two lines of beads up against the small knot until the beads are tightly stacked. Make a single twist at the base of the two beaded arms.
Place the fold of the chenille stem in the center of the net gathering the net up over the beads. Dip the folded end into craft glue and put it into the top of the wooden bead or candle cup base. Set aside and allow the glue to dry.
Tie the ribbon into a bow approximately an inch
from loop to loop and glue on the front of your bluebonnet vase. Glue a
pinback or a magnet to the opposite side and set aside to dry thoroughly
Go to... ~ Lesson 3 ~ Classroom Page ~ Other Classes
Bluebonnet Crafters
Bluebonnet Village Craft Network
http://www.BluebonnetVillage.com/


 |
Crafty College is part of the virtual arts and crafts community, World Wide Visions!